Studio Italia Design > MakeUp > Small
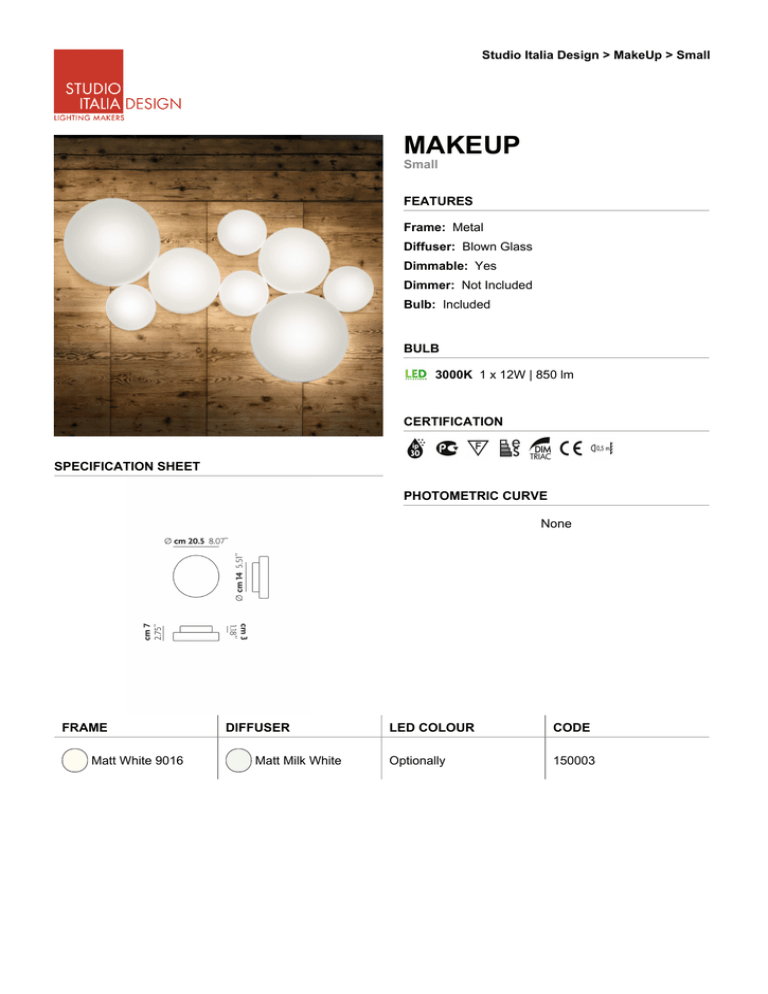
MAKEUP
Small
FEATURES
Frame: Metal
Diffuser: Blown Glass
Dimmable: Yes
Dimmer: Not Included
Bulb: Included
BULB
3000K 1 x 12W | 850 lm
CERTIFICATION
SPECIFICATION SHEET
PHOTOMETRIC CURVE
None
FRAME
Matt White 9016
DIFFUSER
Matt Milk White
LED COLOUR
CODE
Optionally
150003
Studio Italia Design > MakeUp > Medium
MAKEUP
Medium
FEATURES
Frame: Metal
Diffuser: Blown Glass
Dimmable: Yes
Dimmer: Not Included
Bulb: Included
BULB
3000K 1 x 18W | 1600 lm
CERTIFICATION
SPECIFICATION SHEET
PHOTOMETRIC CURVE
FRAME
Matt White 9016
DIFFUSER
Matt Milk White
LED COLOUR
CODE
Optionally
150002
Studio Italia Design > MakeUp > Large
MAKEUP
Large
FEATURES
Frame: Metal
Diffuser: Blown Glass
Dimmable: Yes
Dimmer: Not Included
Bulb: Included
BULB
3000K 1 x 18W | 1600 lm
CERTIFICATION
SPECIFICATION SHEET
PHOTOMETRIC CURVE
None
FRAME
Matt White 9016
DIFFUSER
Matt Milk White
LED COLOUR
CODE
Optionally
150001
MAKEUP AP2-PL2
Ita-Eng
28.04.15_00
Wall & Ceiling | Small
Fig.2
Push!
9 mm
220-240V 50/60 Hz
2700K
A
8,7W - 800 lm
D
Disinserire la tensione prima di operare sull’apparecchio
ISTRUZIONI DI MONTAGGIO
D
1)
2)
3)
4)
Rimuovere il disco [C] dalla piastra [K] svitando le due viti [E](Fig.1)
Rimuovere la piastra [K] dalla scatola a muro [A] svitando le due viti [F]
Fissare la scatola a muro [A] alla parete attraverso i fori asolati [G].
Passare i cavi elettrici dalla scatola a muro [A] nel foro [Y] della piastra
[K] e riposizionare la piastra [K] riavvitando le due viti [F] (Fig.1)
5) Eseguire il collegamento elettrico al morsetto [B] più vicino al foro
ingresso cavi (vedi particolare Fig.2 per il collegamento).
Attenzione: per l’installazione multipla seguire le istruzioni allegate
6) Riposizionare il disco [C] sulla piastra [K] riavvitando le due viti [E]
7) Inserire il vetro diffusore [L] sulla scatola a muro [A] facendo coincidere
le tre corsie [H] (Fig.3) con le tre guide [D] sulla scatola (Fig.1)
Quindi girare il vetro in senso orario fino all’incastro con la scatola a
muro [A] (chiusura a baionetta).
Attenzione a non forzare troppo il vetro durante l’incastro per non
rischiare di romperlo.
G
D
Y
K
1
2
F
B
F
C
Turn off the power to the electrical box before beginning installation
MOUNTING INSTRUCTIONS
E
E
1) Undo the screws [E] and remove the disk [C] from the plate [K] (Fig.1)
2) Undo the screws [F] and remove the plate [K] from the bracket [A]
3) Fix the bracket [A] on the wall with appropriate fixings through the holes
[G]
4) Pass the electric wires from the bracket [A] into the hole [Y] and place
down the plate [K] by tightening the two screws [F] (Fig.1)
5) Make the electrical connection to terminal [B] closer to the hole [Y] (see
Fig.2)
Attention: follow the separate instruction to install multiple lamps
6) Place down the disc [C] on the the plate [K] by tightening the two screws
[E]
7) Insert the glass [L] on the bracket [A] aligning the three slits [H] with the
rails [D] on the bracket (Fig.3)
Then turn the glass clockwise until it stops on the bracket [A] (bayonet
closure)
Pay attention to not force too much glass in the box in order not to
break it.
Fig.1
D
L
H
Fig.3
Garanzie | Warranty
La Studio Italia Design garantisce i suoi prodotti essere privi da difetti di materiale e di lavorazione per la durata di un anno dalla consegna. Durante tale
periodo la Studio Italia Design riparerà o sostituirà, a sua discrezione, i prodotti che hanno dato prova di difetto.Questa garanzia non è applicata a danni
risultanti dall’incidente , alterazione, manomissione, abuso e negligenza. Questa garanzia non è applicata alle lampadine, che non sono prodotti fatti dalla
Studio Italia Design e fornite dalla Studio Italia Design solo come una comodità.
Studio Italia Design warrants its to be free from defects in materials and workmanship for a period of one year date of delivery. During this warranty period
Studio Italia Design will repair or replace, at its option, product that are proven to be defective. This warranty does not apply to damages resulting from
accidental, alteration, tampering, misuse, negligence or abuse.This warranty does not apply to light bulbs, which are not products manufactured by Studio
Italia Design and supplied by Studio Italia Design only as an accomodation.
Conservare le istruzioni per una manutenzione futura | Keep these instructions for future reference
Operazioni da far eseguite a personale qualificato | To be installed by a qualified licensed electrician only
www.studioitaliadesign.com / [email protected] / Via Pialoi, 32, 30020, Marcon, Venezia, ITALY
-
MAKEUP AP1-PL1-AP-PL
Ita-Eng
29.04.15_00
Wall & Ceiling | Medium - Large
Push!
9 mm
220-240V 50/60 Hz
17W - 1590 lm
2700K
Disinserire la tensione prima di operare sull’apparecchio
D
Fig.2
B
ISTRUZIONI DI MONTAGGIO
Y
1) Rimuovere il disco [C] dalla piastra [K] svitando le due viti [E]
2) Rimuovere la piastra [K] dalla scatola a muro [A] svitando le due viti
[F] (Fig.1)
3) Fissare la scatola a muro [A] alla parete attraverso i fori asolati [G].
4) Passare i cavi elettrici dalla scatola a muro [A] nel foro [Y] della
piastra [K] e riposizionare la piastra [K] riavvitando le due viti [F]
5) Eseguire il collegamento elettrico al morsetto [B] più vicino al foro
ingresso cavi (vedi particolare Fig.2 per il collegamento).
Attenzione: per l’installazione multipla seguire le istruzioni allegate
6) Riposizionare il disco [C] sulla piastra [K] riavvitando le due viti [E]
7) Inserire il vetro diffusore [L] sulla scatola a muro [A] facendo
coincidere le tre corsie [H] (Fig.3) con le tre guide [D] sulla scatola.
Quindi girare il vetro in senso orario fino all’incastro con la scatola a
muro [A] (chiusura a baionetta).
Attenzione a non forzare troppo il vetro durante l’incastro per non
rischiare di romperlo.
D
1
G
D
A
2
C
E
E
Fig.1
Turn off the power to the electrical box before beginning installation
MOUNTING INSTRUCTIONS
Y
1) Undo the screws [E] and remove the disk [C] from the plate [K]
2) Undo the screws [F] and remove the plate [K] from the bracket [A]
(Fig.1)
3) Fix the bracket [A] on the wall with appropriate fixings
through the holes [G]
4) Pass the wires from the bracket [A] into the hole [Y] and
place down the plate [K] by tightening the two screws [F]
5) Make the electrical connection to terminal [B] closer to the
hole [Y] (see Fig.2)
Attention: follow the separate instruction to install multiple
lamps
6) Place down the disc [C] on the the plate [K] by tightening the
two screws [E]
7) Insert the glass [L] on the bracket [A] aligning the three slits [H]
with the rails [D] on the bracket (Fig.3). Then turn the glass
clockwise until it stops on the bracket [A] (bayonet closure)
Pay attention to not force too much glass in the box in order not to
break it.
D
Fig.3
L
H
Garanzie | Warranty
La Studio Italia Design garantisce i suoi prodotti essere privi da difetti di materiale e di lavorazione per la durata di un anno dalla consegna. Durante tale
periodo la Studio Italia Design riparerà o sostituirà, a sua discrezione, i prodotti che hanno dato prova di difetto.Questa garanzia non è applicata a danni
risultanti dall’incidente , alterazione, manomissione, abuso e negligenza. Questa garanzia non è applicata alle lampadine, che non sono prodotti fatti dalla
Studio Italia Design e fornite dalla Studio Italia Design solo come una comodità.
Studio Italia Design warrants its to be free from defects in materials and workmanship for a period of one year date of delivery. During this warranty period
Studio Italia Design will repair or replace, at its option, product that are proven to be defective. This warranty does not apply to damages resulting from
accidental, alteration, tampering, misuse, negligence or abuse.This warranty does not apply to light bulbs, which are not products manufactured by Studio
Italia Design and supplied by Studio Italia Design only as an accomodation.
Conservare le istruzioni per una manutenzione futura | Keep these instructions for future reference
Operazioni da far eseguite a personale qualificato | To be installed by a qualified licensed electrician only
www.studioitaliadesign.com / [email protected] / Via Pialoi, 32, 30020, Marcon, Venezia, ITALY
-
MAKEUP - Multiple
Italiano
29.04.15_00
Wall & Ceiling
Disinserire la tensione prima di operare sull’apparecchio
G
ISTRUZIONI DI MONTAGGIO
A
1) Installare la scatola a muro principale [A]
seguendo le istruzioni per l’installazione singola.
2) Consulta la tabella sottostante (Tab.1) per
individuare la corretta distanza per il montaggio
di 2 apparecchi collegati.
Nota: da ogni lampada si possono derivare i
collegamenti per altre 2 lampade. Tale
operazione può essere ripetuta fino ad un
massimo di 50 apparecchi collegati ad un
singolo punto di alimentazione.
3) Dopo aver trovato la posizione esatta installare
la seconda scatola a muro [A]. Consigliamo di
avvitare una sola delle viti di fissaggio nel foro
[G] (vedi particolare Fig.1) per poter così
verificare ed individuare l’esatta posizione.
4) Prima di fissare definitivamente la scatola a muro
[A] consigliamo di fare anche una prova
appoggiando provvisoriamente il vetro diffusore
in sede. Se la posizione è esatta fissare
definitivamente la scatola a muro [A] tramite
delle viti negli altri fori [G]
5) Con un cacciavite aprire i fori laterali [M] che si
vogliono utilizzare (Fig.2) per collegare le
scatole derivate. Passare i cavi elettrici nei fori
[M] e collegarli con i morsetti liberi [B](vedi
Fig.3)
Procedere in questo modo per tutte le lampade
6) Avvitare i dischi [C] sulle rispettive montature
7) Inserire i vetri diffusori nelle rispettive sedi.
A
L
G
e
Larg
L
L
Fig.1
Fig.3
Push!
9 mm
M
A
M
Fig.2
C
Tab.1
Distanze minime tra i bordi delle scatole a muro [A] affinché i vetri diffusori non si tocchino una volta montati
7 cm
A
A
small
small
A
medium
medium
large
large
8 cm
7 cm
8 cm
A
A
small
9 cm
7 cm
medium
A
medium
large
large
small
Garanzie
La Studio Italia Design garantisce i suoi prodotti essere privi da difetti di materiale e di lavorazione per la durata di un anno dalla consegna. Durante tale
periodo la Studio Italia Design riparerà o sostituirà, a sua discrezione, i prodotti che hanno dato prova di difetto.
Questa garanzia non è applicata a danni risultanti dall’incidente , alterazione, manomissione, abuso e negligenza.
Questa garanzia non è applicata alle lampadine, che non sono prodotti fatti dalla Studio Italia Design e fornite dalla Studio Italia Design solo come una
comodità.
Conservare le istruzioni per una manutenzione futura
Le operazioni indicate devono essere eseguite da personale qualificato
www.studioitaliadesign.com / [email protected] / Via Pialoi, 32, 30020, Marcon, Venezia, ITALY
-
MAKEUP - Multiple
English
29.04.15_00
Wall & Ceiling
Turn off the power to the electrical box before beginning installation
G
MOUNTING INSTRUCTIONS
1) Install the first bracket [A] following instructions
for the single lamp
2) See the table (Tab.1) below to find the correct
distance for the mounting of two connected
devices. Note: from each lamp you can get
connections for another 2 lamps. This
operation can be repeated up to a maximum
of 50 devices connected to a single main
power.
3) Install the second wall box [A]. We
recommend to screw one of the fixing screws
into the hole [G] (see Fig.1) and check the
exact position.
4) Before you install the second bracket [A] we
suggest that you try to place the glass diffuser
on the box. If the location is correct fix the
wall box with the screws in the other holes [G]
5) Use a screwdriver to open the side holes [M]
to be used for connecting the boxes derived
(Fig.2). Pass the electrical cables into the holes
[M] and connect them to free terminals [B]
(see Fig.3)
Repeat these steps for each lamp
6) Place the disks [C] on the frame and fix it with
the screws.
7) Then turn the glass diffusers clockwise until it
stops on the bracket [A]
A
A
L
G
e
Larg
L
L
Fig.1
Fig.3
Push!
9 mm
M
A
M
Fig.2
C
Tab.1
Minimum distances between edges of the bracket [A] because the glass diffusers are not touching when assembled
7 cm
A
A
small
small
A
medium
medium
large
large
8 cm
7 cm
8 cm
A
A
small
9 cm
7 cm
medium
A
medium
large
large
small
Warranty
Studio Italia Design warrants its to be free from defects in materials and workmanship for a period of one year date of delivery. During this warranty period
Studio Italia Design will repair or replace, at its option, product that are proven to be defective.
This warranty does not apply to damages resulting from accidental, alteration, tampering, misuse, negligence or abuse.
This warranty does not apply to light bulbs, which are not products manufactured by Studio Italia Design and supplied by Studio Italia Design only as an
accomodation.
Keep these instructions for future reference
To be installed by a qualified licensed electrician only
www.studioitaliadesign.com / [email protected] / Via Pialoi, 32, 30020, Marcon, Venezia, ITALY
-

