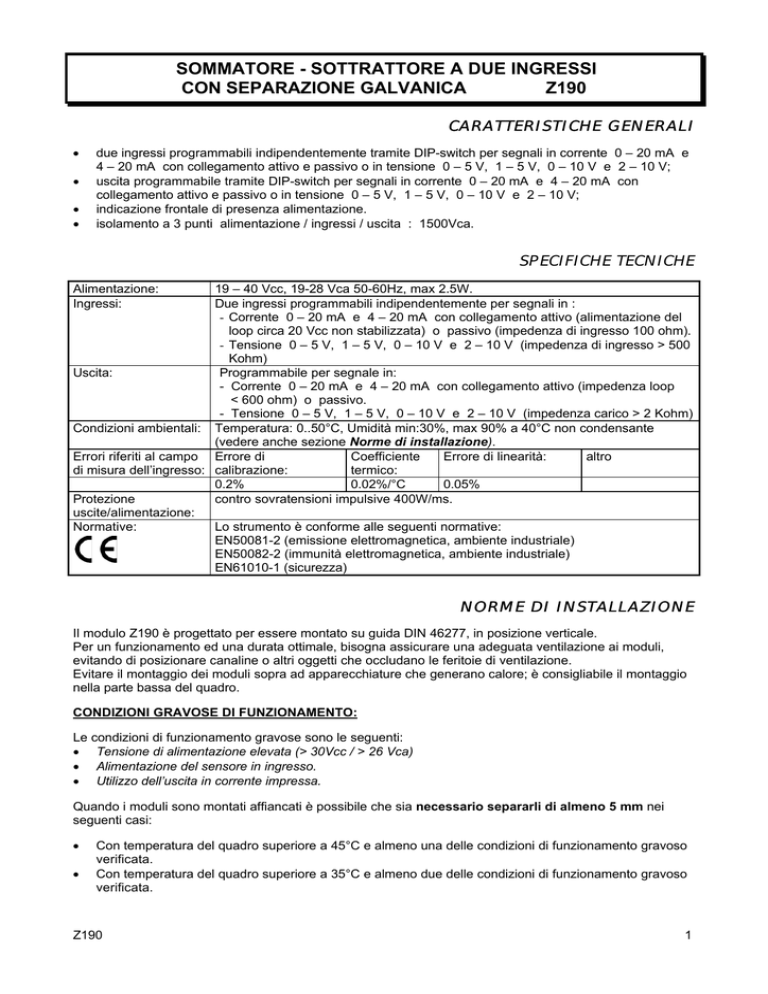
SOMMATORE - SOTTRATTORE A DUE INGRESSI
CON SEPARAZIONE GALVANICA
Z190
CARATTERISTICHE GENERALI
•
•
•
•
due ingressi programmabili indipendentemente tramite DIP-switch per segnali in corrente 0 – 20 mA e
4 – 20 mA con collegamento attivo e passivo o in tensione 0 – 5 V, 1 – 5 V, 0 – 10 V e 2 – 10 V;
uscita programmabile tramite DIP-switch per segnali in corrente 0 – 20 mA e 4 – 20 mA con
collegamento attivo e passivo o in tensione 0 – 5 V, 1 – 5 V, 0 – 10 V e 2 – 10 V;
indicazione frontale di presenza alimentazione.
isolamento a 3 punti alimentazione / ingressi / uscita : 1500Vca.
SPECIFICHE TECNICHE
Alimentazione:
Ingressi:
19 – 40 Vcc, 19-28 Vca 50-60Hz, max 2.5W.
Due ingressi programmabili indipendentemente per segnali in :
- Corrente 0 – 20 mA e 4 – 20 mA con collegamento attivo (alimentazione del
loop circa 20 Vcc non stabilizzata) o passivo (impedenza di ingresso 100 ohm).
- Tensione 0 – 5 V, 1 – 5 V, 0 – 10 V e 2 – 10 V (impedenza di ingresso > 500
Kohm)
Uscita:
Programmabile per segnale in:
- Corrente 0 – 20 mA e 4 – 20 mA con collegamento attivo (impedenza loop
< 600 ohm) o passivo.
- Tensione 0 – 5 V, 1 – 5 V, 0 – 10 V e 2 – 10 V (impedenza carico > 2 Kohm)
Condizioni ambientali: Temperatura: 0..50°C, Umidità min:30%, max 90% a 40°C non condensante
(vedere anche sezione Norme di installazione).
Errori riferiti al campo Errore di
Coefficiente
Errore di linearità:
altro
di misura dell’ingresso: calibrazione:
termico:
0.2%
0.02%/°C
0.05%
Protezione
contro sovratensioni impulsive 400W/ms.
uscite/alimentazione:
Normative:
Lo strumento è conforme alle seguenti normative:
EN50081-2 (emissione elettromagnetica, ambiente industriale)
EN50082-2 (immunità elettromagnetica, ambiente industriale)
EN61010-1 (sicurezza)
NORME DI INSTALLAZIONE
Il modulo Z190 è progettato per essere montato su guida DIN 46277, in posizione verticale.
Per un funzionamento ed una durata ottimale, bisogna assicurare una adeguata ventilazione ai moduli,
evitando di posizionare canaline o altri oggetti che occludano le feritoie di ventilazione.
Evitare il montaggio dei moduli sopra ad apparecchiature che generano calore; è consigliabile il montaggio
nella parte bassa del quadro.
CONDIZIONI GRAVOSE DI FUNZIONAMENTO:
Le condizioni di funzionamento gravose sono le seguenti:
• Tensione di alimentazione elevata (> 30Vcc / > 26 Vca)
• Alimentazione del sensore in ingresso.
• Utilizzo dell’uscita in corrente impressa.
Quando i moduli sono montati affiancati è possibile che sia necessario separarli di almeno 5 mm nei
seguenti casi:
•
•
Con temperatura del quadro superiore a 45°C e almeno una delle condizioni di funzionamento gravoso
verificata.
Con temperatura del quadro superiore a 35°C e almeno due delle condizioni di funzionamento gravoso
verificata.
Z190
1
COLLEGAMENTI ELETTRICI
Si raccomanda l’uso di cavi schermati per il collegamento dei segnali; lo schermo dovrà essere collegato ad
una terra preferenziale per la strumentazione. Inoltre è buona norma evitare di far passare i conduttori nelle
vicinanze di cavi di installazioni di potenza quali inverter, motori, forni ad induzione ecc.
ALIMENTAZIONE
La tensione di alimentazione deve essere compresa tra 19 e 40 Vcc (polarità indifferente),
19 e 28 Vca; vedere anche la sezione NORME DI INSTALLAZIONE.
I Iimiti superiori non devono essere superati, pena gravi danni al modulo.
E’ necessario proteggere la sorgente di alimentazione da eventuali guasti del modulo
mediante fusibile opportunamente dimensionato.
19-40Vcc
19-28Vca
2 3
INGRESSO 1 – Collegamenti e predisposizione dei DIP-switch :
9
mA
7
7
mA
V
7
DIP-SWITCH SW1
1234
10
0..20mA
10
4..20mA
0..5V
1..5V
0..10V
2..10V
Corrente – ingresso attivo
Corrente – ingresso passivo
Tensione
INGRESSO 2 – Collegamenti e predisposizione dei DIP-switch
Corrente – ingresso attivo
Corrente – ingresso passivo
Tensione
9
mA
8
8
mA
V
8
DIP-SWITCH SW2
1234
10
0..20mA
10
4..20mA
0..5V
1..5V
0..10V
2..10V
USCITA – Collegamenti e predisposizione dei DIP-switch
Corrente – ingresso attivo
Corrente – ingresso passivo
Tensione
6
+
1
+
5
DIP-SWITCH SW4
+
1234
0..20mA
1
4
4
4..20mA
0..5V
1..5V
0..10V
2..10V
Z190
2
NOTE IMPORTANTI - INGRESSI / USCITA in CORRENTE :
Il collegamento ATTIVO va utilizzato quando il loop di corrente deve essere alimentato direttamente dal
modulo Z190, mentre il collegamento PASSIVO va utilizzato nel caso in cui l’alimentazione del loop di
corrente proviene dall’esterno.
Il modulo Z190 può ALIMENTARE (COLLEGAMENTO ATTIVO) CONTEMPORANEAMENTE SOLO DUE
LOOP, quindi se viene utilizzato il collegamento attivo per entrambi gli ingressi non si potrà usare il
collegamento attivo per l’uscita, mentre se viene utilizzato il collegamento attivo per l’uscita si potrà
utilizzare il collegamento attivo solo per uno dei due ingressi.
PREDISPOSIZIONE DELLO STRUMENTO COME SOMMATORE O COME SOTTRATTORE :
Lo strumento può eseguire la somma di due segnali : INGRESSO 1 + INGRESSO 2
oppure la differenza di due segnali : INGRESSO 1 – INGRESSO 2 .
Predisporre i DIP-switch SW4 in accordo con l’operazione da eseguire sui segnali di ingresso.
DIP-SWITCH SW4
123
IN1 + IN2
IN1 - IN2
Salvo diversa indicazione lo strumento viene spedito configurato per somma di due segnali di uguale peso.
SOMMA DI SEGNALI CON PESO DIVERSO :
Collegare Il segnale con peso maggiore all’ INGRESSO 1, quello con peso minore all’ INGRESSO 2.
Procedura per la taratura dello strumento :
1 Collegare un tester (portata 10Vcc) tra i morsetti 12 (+) e 10 (-), un generatore di segnale tra i
morsetti 7 (+) e 10 (-) impostato per fornire un segnale equivalente al fondo-scala.
2 Agire sul trimmer “SPAN IN1” fino a leggere sul tester la tensione data dalla seguente formula :
V = 10 *
FS1
FS1 + FS 2
(in cui FS1 e FS2 sono rispettivamente i fondi-scala in unità ingegneristiche dei segnali collegati agli
ingressi IN1 e IN2).
3 Collegare un tester (portata 10Vcc) tra i morsetti 11 (+) e 10 (-), un generatore di segnale tra i morsetti
8 (+) e 10 (-) impostato per fornire un segnale equivalente al fondo-scala.
4 Agire sul trimmer “SPAN IN2” fino ad leggere sul tester la tensione data dalla seguente formula:
V = 10 *
FS 2
FS1 + FS 2
(in cui FS1 e FS2 sono rispettivamente i fondi-scala in unità ingegneristiche dei segnali collegati agli
ingressi IN1 e IN2).
Esempio : somma di due segnali 4-20mA corrispondenti a due portate di 150 l/h e di 50 l/h.
All’ingresso IN1 andrà collegato il segnale pari a 150 l/h ed all’ingresso IN2 il segnale pari a 50 l/h.
Collegare un generatore ai morsetti 7 e 10 e generare una corrente di 20mA, collegare un tester tra i
morsetti 12 e 10 e regolare il trimmer “SPAN IN1” fino a leggere la seguente tensione :
V = 10 *
150
= 7,5 Volt
150 + 50
Collegare un generatore ai morsetti 8 e 10 e generare una corrente di 20mA, collegare un tester tra i
morsetti 11 e 10 e regolare il trimmer “SPAN IN2” fino a leggere la seguente tensione :
V = 10 *
Z190
50
= 2,5 Volt
150 + 50
3
DIFFERENZA DI INGRESSI CON PESO DIVERSO :
Collegare il segnale con peso maggiore all’ INGRESSO 1, quello con peso minore all’ INGRESSO 2.
Procedura per la taratura dello strumento :
1 Collegare un tester (portata 10Vcc) tra i morsetti 12 (+) e 10 (-), un generatore di segnale tra i
morsetti 7 (+) e 10 (-) impostato per fornire un segnale equivalente al fondo-scala.
2 Agire sul trimmer “SPAN IN1” fino a leggere sul tester una tensione di 5 Volt
3 Collegare un tester (portata 10Vcc) tra i morsetti 11 (+) e 10 (-), un generatore di segnale tra i
morsetti 8 (+) e 10 (-) impostato per fornire un segnale equivalente al fondo-scala.
4 Agire sul trimmer SPAN IN2 fino ad leggere sul tester la tensione :
V = 5*
FS 2
FS1
(in cui FS1 e FS2 sono rispettivamente i fondi-scala in unità ingegneristiche dei segnali collegati agli
ingressi IN1 e IN2).
Esempio : differenza di due segnali 4-20mA corrispondenti a due pressioni di 10 bar e di 4 bar.
All’ingresso IN1 andrà collegato il segnale pari a 10 bar, ed all’ingresso IN2 il segnale pari a 4 bar.
Collegare un generatore ai morsetti 7 e 10 e generare una corrente di 20mA, collegare un tester tra i
morsetti 12 e 10 e regolare il trimmer “SPAN IN1” fino a leggere una tensione di 5 Volt.
Collegare un generatore ai morsetti 8 e 10 e generare una corrente di 20mA, collegare un tester tra i
morsetti 11 e 10 e regolare il trimmer “SPAN IN2” fino a leggere la seguente tensione
V = 5*
4
= 2 Volt
10
E.S.A.M. unicenter s.r.l.
Elettronica Strumenti Apparecchiature Misura
Z190
20010 Bareggio (MI) Italia – Via S. Pietro, 10
Tel. 02.903.61.297 (3 l.r.a.) – fax 02.903.62.314
4
ADDER / SUBTRACTOR TWO INPUTS WITH GALVANIC SEPARATION
Z190
•
•
•
•
two independent inputs programmabl
e via dip switches forcurrent signal
s 0 - 20 mA and 4 - 20 mA
with active and passive connection orvol
tage signal
s 0 - 5 V, 1 - 5 V, 0 - 10 V and 2 - 10 V;
output programmabl
e via dip switches forcurrent signal
s 0 - 20 mA and 4 - 20 mA with active and
passive connection orvol
tage signal
s 0 - 5 V, 1 - 5 V, 0 - 10 V and 2 - 10 V;
powersuppl
yon front panelindicator.
3 point insul
ation (powersuppl
y /input /output): 1500Vac.
!#"$&%('#)+*, ".- "$&%(/"10!2)
Powersuppl
y:
Inputs:
Output:
Environmental
conditions:
Errors referred to max
measuring range:
Protection for
outputs/powersuppl
y:
Norms:
19 – 40 Vdc,19-28 Vac 50-60Hz,max 2.5W ;
Two independent inputs eachprogrammabl
e for:
- 0 - 20 mA and 4 - 20 mA current withactive connection (l
oop powersuppl
y
approximatel
y 20 Vdcnot stabil
ized) orpassive connection (input impedance
100 ohm).
- 0 - 5 V, 1 - 5 V, 0 - 10 V and 2 - 10 V vol
tage (input impedance > 500 Kohm)
Programmabl
e for:
- 0 - 20 mA and 4 - 20 mA current signal
s withactive connection (l
oop
impedance < 600 ohm) orpassive connection.
- 0 - 5 V, 1 - 5 V, 0 - 10 V and 2 - 10 V vol
tage signal
s (l
oad impedance > 2
Kohm)
Temperature: 0..50°C,Humidity min: 30% ,max: 90% a 40°C non condensing (al
so
see section Installation instructions).
Cal
ibration error:
Thermal
Linearity error:
Others:
Coefficient:
0.2%
0.02% /°C
0.05%
against impul
sive over-vol
tages 400W /ms.
Compl
yingequipments withprescriptions :
EN50081-2 (el
ectromagnetic emission,industrialenvironnement)
EN50082-2 (el
ectromagnetic immunity,industrialenvironnement)
EN61010-1 (safety)
#35463789,
Z190 modul
e is designed to be mounted on a DIN 46277 bar,in verticalposition.
To obtain an optimalworkingand duration,it is necessaryto assure an adeguate ventil
ation to modul
es,
avoidingto pl
ace raceways orotherobj
ects that can cl
ose abat-vents.
Avoid to mount modul
es overdeviced that generate heat; we suggest to mount devices in the l
owerside of
the panel
.
HEAVY WORKING CONDITIONS:
Heavyworkingconditions are:
• Hi
ghpowervol
tage a (> 30Vdc /> 26 Vac)
• Inputsensorfeeded.
• Useofoutputi
ni
mpressedcurrent.
W hen modul
es are put side by side it s possibl
e that it is necessaryto separate them atleast5 m m in the
fol
l
owingcases:
•
•
Upperboard temperature higherthan 45°C and at l
east one ofthe heavyworkingconditions verified.
Upperboard temperature higherthan 35°C and at l
east two ofthe heavyworking temperature verified.
MI000290
5
:;:<=,>?8<@;<ACBCBD:E<=?8A5BF
We recommand to use shielded cables to do signals connection; monitor must be connected to a
preferential ground for devices. Besides it is a good rool avoid to pass wires near power installation cables
like inverters, motors, induction furnaces etc.
POWER SUPPLY
Power voltage must be in a range from 19 to 40 Vdc (indifferent polarity), from 19 to 28
Vac; see also section INSTALLATION NORMS.
Upper limits must not be exceeded,if it happen there could be damages for
module.
It is necessary to protect power source from possible module’
s failure by fuse correctly
19-40Vdc
19-28Vac
2 3
INPUT 1 – Connections and arrangement of dip switches :
Current – active input
Current – passive input
9
mA
Voltage
7
7
mA
V
7
DIP-SWITCH SW1
1234
10
0..20mA
10
4..20mA
0..5V
1..5V
0..10V
2..10V
INPUT 2 – Connections and arrangement of dip switches :
Current – active input
Current – passive input
Voltage
9
mA
8
8
mA
V
8
DIP-SWITCH SW2
1234
10
0..20mA
10
4..20mA
0..5V
1..5V
0..10V
2..10V
OUTPUT – Connections and arrangement of dip switches :
Current – active output
Current – passive output
Voltage
6
+
1
+
5
DIP-SWITCH SW4
+
1234
0..20mA
1
4
4
4..20mA
0..5V
1..5V
0..10V
2..10V
MI000290
6
IMPORTANT NOTES - INPUTS / OUTPUT in CURRENT :
For the current input or output the ACTIVE connection must be used when the input or output loop is
powered directly from the Z190 module; the PASSIVE connection must be used if the current loop power
supply comes from the outside.
The Z190 module can drive a maximum load of 600 ohm on the loop, with loop power supply protected
against short circuits.
The Z190 module CAN DRIVE ONLY TWO LOOPS SIMULTANEOUSLY, so if the active connection is
used for both input, it cannot be used for the output whereas if the active connection is used for the output, it
can be used only for one input.
DEVICE SET AS ADDER OR SUBTRACTOR :
Device can do the sum of two signals : INPUT 1 + INPUT 2
or the difference of two signals: INPUT 1 – INPUT 2 .
Set DIP-switches SW4 to do sum or subtraction as the following table :
DIP-SWITCH SW4
123
IN1 +IN2
IN1 - IN2
If there is no different indication device is shipped configurated for the sum of two signals having the same
value.
SUM OF INPUT WITH DIFFERENT IMPORTANCE :
Most significant input will be INPUT 1, the less inportant one will be INPUT 2.
Procedure to do device’s calibration :
1 Connect a tester (10Vdc full scale) between 12 (+) and 10 (-) clamps, a signal generator between 7 (+)
and 10 (-) clamps set to give a signal equal to full scale.
2 Move trimmer “SPAN IN1” till on the tester will appare the voltage given by the following formula :
V = 10 *
FS1
FS1 + FS 2
(FS1 and FS2 are the full scale in engineering units for inputs IN1 e IN2).
3 Connect a tester (10Vdc full scale) between 11 (+) and 10 (-) clamps, a signal generator between
8 (+) and 10 (-) clamps set to give a signal equal to full scale.
4 Move trimmer “SPAN IN2”till on the tester will appare the voltage given by the following formula :
V = 10 *
FS 2
FS1 + FS 2
(FS1 and FS2 are the full scale in engineering units for inputs IN1 e IN2).
Example: sum between two signals 4-20mA corresponding to two flow 150l/h and 50l/h.
At input IN1 will be assigned signal 150 l/h and at input IN2 will be assigned signal 50 l/h.
Connect a generator between 7 and 10 clamps and generate a current 20 mA, connect a tester between 12
and 10 clamps and regulate trimmer “SPAN IN1”till you read the following voltage :
V = 10 *
150
= 7,5 Volt
150 + 50
Connect a generator between 8 and 10 clamps and generate a current 20 mA, , connect a tester between 11
and 10 clamps and regulate trimmer “SPAN IN2”till you read the following voltage :
V = 10 *
MI000290
50
= 2,5 Volt
150 + 50
7
DIFFERENCE BETWEEN INPUTS WITH DIFFERENT SIGNIFICANCE :
Most significant input will be INPUT 1, the less inportant one will be INPUT 2.
Procedure to do device’s calibration :
1 Connect a tester (10Vdc full scale) between 12 (+) and 10 (-) clamps, a signal generator between 7 (+)
and 10 (-) clamps set to give a signal equal to full scale.
2 Move trimmer “SPAN IN1” till on the tester will appare the voltage 5 Volt
3 Connect a tester (10Vdc full scale) between 11 (+) and 10 (-) clamps, a signal generator between
8 (+) and 10 (-) clamps set to give a signal equal to full scale.
4 Move trimmer “SPAN IN2” till on the tester will appare the voltage given by the following formula :
V = 5*
FS 2
FS1
(FS1 and FS2 are the full scale in engineering units for inputs IN1 e IN2).
Example: difference between two 4-20mA signals corresponding to two pressure 10 bar and 4 bar.
At input IN1 will be assigned signal 10 bar, and at input IN2 will be assigned signal 4 bar.
Connect a generator between 7 and 10 clamps and generate a current 20 mA, connect a tester between 12
and 10 clamps and regulate trimmer “SPAN IN1” till you read the voltage 5 Volt.
Connect a generator between 8 and 10 clamps and generate a current 20 mA, , connect a tester between 11
and 10 clamps and regulate trimmer “SPAN IN2” till you read the following voltage :
V = 5*
E.S.A.M. unicenter s.r.l.
Elettronica Strumenti Apparecchiature Misura
MI000290
4
= 2 Volt
10
20010 Bareggio (MI) Italia – Via S. Pietro, 10
Tel. 02.903.61.297 (3 l.r.a.) – fax 02.903.62.314
8

