Rev. 1.3
30-05-2014
WR60 Manuale installazione
REGOLATORE PER LA CARICA DI BATTERIE
DA MODULO FOTOVOLTAICO
• Carica PWM
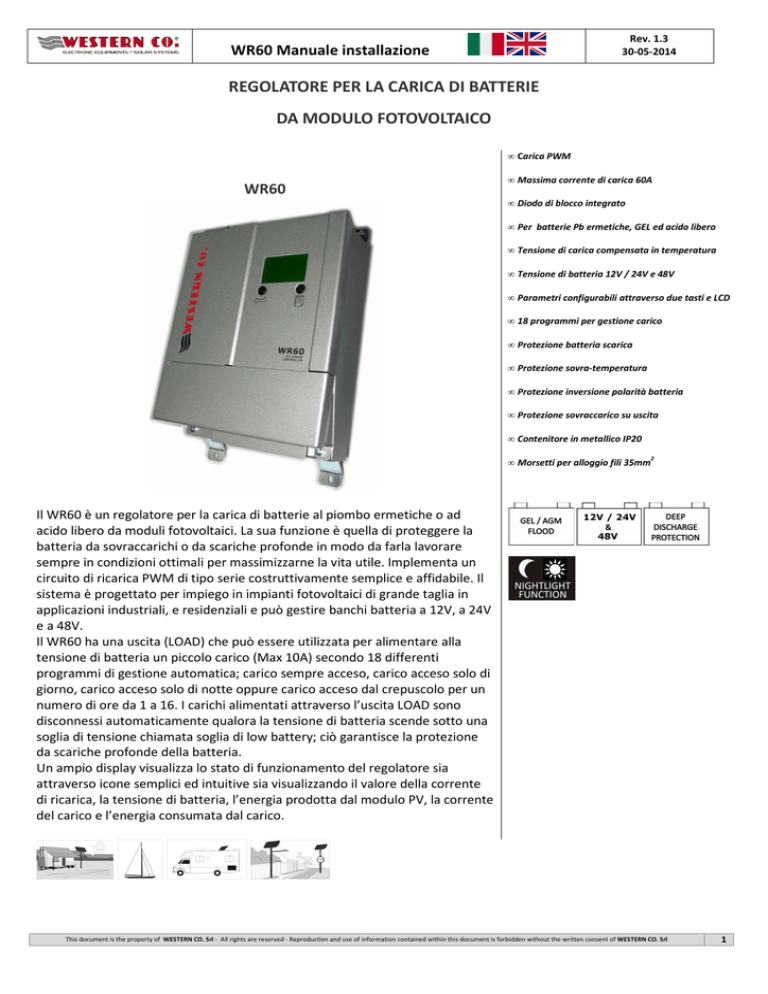
WR60
• Massima corrente di carica 60A
• Diodo di blocco integrato
• Per batterie Pb ermetiche, GEL ed acido libero
• Tensione di carica compensata in temperatura
• Tensione di batteria 12V / 24V e 48V
• Parametri configurabili attraverso due tasti e LCD
• 18 programmi per gestione carico
• Protezione batteria scarica
• Protezione sovra-temperatura
• Protezione inversione polarità batteria
• Protezione sovraccarico su uscita
• Contenitore in metallico IP20
• Morsetti per alloggio fili 35mm2
Il WR60 è un regolatore per la carica di batterie al piombo ermetiche o ad
acido libero da moduli fotovoltaici. La sua funzione è quella di proteggere la
batteria da sovraccarichi o da scariche profonde in modo da farla lavorare
sempre in condizioni ottimali per massimizzarne la vita utile. Implementa un
circuito di ricarica PWM di tipo serie costruttivamente semplice e affidabile. Il
sistema è progettato per impiego in impianti fotovoltaici di grande taglia in
applicazioni industriali, e residenziali e può gestire banchi batteria a 12V, a 24V
e a 48V.
Il WR60 ha una uscita (LOAD) che può essere utilizzata per alimentare alla
tensione di batteria un piccolo carico (Max 10A) secondo 18 differenti
programmi di gestione automatica; carico sempre acceso, carico acceso solo di
giorno, carico acceso solo di notte oppure carico acceso dal crepuscolo per un
numero di ore da 1 a 16. I carichi alimentati attraverso l’uscita LOAD sono
disconnessi automaticamente qualora la tensione di batteria scende sotto una
soglia di tensione chiamata soglia di low battery; ciò garantisce la protezione
da scariche profonde della batteria.
Un ampio display visualizza lo stato di funzionamento del regolatore sia
attraverso icone semplici ed intuitive sia visualizzando il valore della corrente
di ricarica, la tensione di batteria, l’energia prodotta dal modulo PV, la corrente
del carico e l’energia consumata dal carico.
This document is the property of WESTERN CO. Srl - All rights are reserved - Reproduction and use of information contained within this document is forbidden without the written consent of WESTERN CO. Srl
1
Rev. 1.3
30-05-2014
WR60 Manuale installazione
Descrizione generale
WR60 è un regolatore di carica da moduli fotovoltaici per batterie elettrochimiche al piombo di tipo ermetico (SEAL) o
ad acido libero (FLOOD). In fig. 1 è riportato uno schema di principio del WR60.
MICRO CONTROLLER
4
IPAN
1
Icharge
2
VBATT
VPAN
ILOAD
WR-60
3
Fig. 1 Schema di principio
1- Diodo serie: serve ad evitare che durante la notte, quando il modulo fotovoltaico non è illuminato questo possa
assorbire corrente dalla batteria.
2- Il circuito di ricarica può essere pensato come un interruttore che collega il modulo PV in parallelo alla batteria
fintanto che la batteria ha una tensione inferiore alla tensione di ricarica massima (Vch), mentre disconnette il
modulo PV dalla batteria quando la tensione di batteria è maggiore o uguale alla massima tensione di ricarica (Vch).
Il circuito di ricarica è realizzato attraverso componenti a semiconduttore più affidabili e duraturi nel tempo dei
componenti elettromeccanici. Questa tipologia di circuito di ricarica è conosciuta in letteratura tecnica come PWM
serie.
3- Il carico è alimentato con la stessa tensione di batteria (il morsetto positivo dell’uscita LOAD è in comune con il
positivo di batteria) ed è controllato attraverso un interruttore a semiconduttore.
4- Microprocessore: controlla l’intero circuito; misura la corrente e la tensioni del modulo PV, della batteria e del carico
e le visualizza sul display.
Per una più precisa rivelazione della corretta tensione e temperatura di batteria il WR60 misura queste grandezze
attraverso un sensore da posizionare vicino ai morsetti di batteria (il sensore è fornito in dotazione). E’ importante
connettere questo sensore per garantire la compensazione in temperatura della tensione di fine carica del sistema (Vch)
e per una misura della tensione di batteria indipendente dalla caduta di tensione sui cavi. Qualora non si connette
questo sensore il sistema funziona ugualmente, ma la tensione di batteria è misurata sui morsetti interni del WR60,
mentre la compensazione della Vch in funzione della temperatura non è eseguita e prudenzialmente la Vch è impostata
al valore minimo, come se il sistema rilevasse una temperatura di 60°C. Il led L1 (fig. 3) è acceso solo quando la sonda di
temperatura e tensione batteria è correttamente connessa, quindi qualora L1 non fosse acceso verificare le connessioni
della sonda.
This document is the property of WESTERN CO. Srl - All rights are reserved - Reproduction and use of information contained within this document is forbidden without the written consent of WESTERN CO. Srl
2
WR60 Manuale installazione
Rev. 1.3
30-05-2014
Il WR60 ha una riconoscimento automatico della tensione di batteria che gli consente di riconosce automaticamente la
tensione nominale della batteria ad esso connessa e imposta i parametri di ricarica appropriati per come in tab. 5.
All’accensione il WR60 misura la tensione di batteria (Vbatt) sui morsetti interni e a seconda di questa misura riconosce
la tensione nominale di batteria secondo i livelli in tab. 1.
tensione di batteria misurata all’avvio
10.0V < Vbatt < 16.0V
Batteria a 12V
20.0V < Vbatt < 32.0V
Batteria a 24V
40.0V < Vbatt < 64.0V
Batteria a 48V
tab. 1 soglie riconoscimento tensione nominale batteria
Qualora la tensione di batteria non rientra in un delle fasce in tabella 1 il WR60 segnala l’errore E03 (vedi tabella 4), non
ricarica e non alimenta eventuali carichi connessi al sistema. In caso compaia questo errore controllare la tensione del
banco batterie.
Scelta del modulo fotovoltaico e delle stringhe
La scelta dei moduli fotovoltaici da impiegare nel sistema è strettamente legata alla tensione di batteria.
Nella scelta della configurazione della stringa di moduli da impiegare nel sistema è necessario attenersi strettamente a
quanto indicato nella seguente tabella.
Tensione nominale batteria
Caratteristiche moduli PV
batteria a 12V
Stringhe con 36 celle Si mono-cristallino /poli-cristallino
Voc tipica @25 21.0V
Isc massimo 60 A
batteria a 24V
Stringhe con 72 celle Si mono-cristallino /poli-cristallino
Voc tipica @25 42.0V
Isc massimo 60 A
batteria a 48V
Stringhe con 144 celle Si mono-cristallino /poli-cristallino
Voc tipica @25 84.0V
Isc massimo 60 A
tab. 2
Quando si collegano più di 2 moduli fotovoltaici in parallelo è obbligatorio utilizzare i diodi di parallelo secondo come
indicato in fig.
fig. 2. Collegare 3 o più stringhe in parallelo utilizzando adeguati diodi di parallelo
Qualora sia necessario inserire i diodi di parallelo come in fig. 2 consigliamo di acquista il prodotto Western Co JB5.
Schema di collegamento
1) Installare il WR60 in un luogo asciutto ed adeguatamente arieggiato, fissato su di una superficie non infiammabile e
posizionato in modo da lasciare uno spazio privo di ostacoli di almeno 10Cm nell’intorno del dispositivo che ne
permette il raffreddamento per convezione naturale dell’aria.
2) Rimuovere lo sportello anteriore per accedere alle connessioni elettriche (vedi fig. 5 più avanti in questo manuale).
3) Collegare nell’ordine: carico, sonda per misura temperatura e tensione batteria (in dotazione), modulo PV e per
ultimo la batteria come nello schema fig. 3. Alla connessione della batteria il regolatore si accende e inizia a
funzionare. Le sezioni di cavo debbono essere scelte in modo che in ogni tratto di cavo la massima caduta di tensione
This document is the property of WESTERN CO. Srl - All rights are reserved - Reproduction and use of information contained within this document is forbidden without the written consent of WESTERN CO. Srl
3
Rev. 1.3
30-05-2014
WR60 Manuale installazione
ammessa sia minore dell’1.5% della tensione nominale del sistema. In tabella 3 sono riportate la lunghezza massima
del cavo che garantisce una caduta di tensione inferiore a 3.0% di Vbatt nominale in funzione della sezione in mm2.
4) Si possono collegare al WR60 batterie al piombo con tensione nominale 12V, 24V oppure 48V. All’accensione il
regolatore misura la tensione di batteria e da questa riconosce la tensione nominale del banco batteria ad esso
connesso e imposta automaticamente i corretti livelli di tensione di ricarica (vedi descrizione a pag. 2). L’utente deve
però configurare il tipo di batteria in uso per adeguare la corretta tensione di ricarica (Vch ). Si deve impostare la
configurazione SEAL se si usano batteria ermetiche VRLA o di tipo GEL, mentre si deve scegliere la configurazione
FLOOD se si usano batterie ad acido libero. Per fare questa impostazione seguire le indicazioni nella sezione
‘Configurazione del sistema ’ più avanti in questo manuale.
5) Impostare il programma di gestione del carico adeguato alla propria applicazione. Nota: non collegare all’uscita LOAD
carichi che assorbono una corrente superiore a 10A, altrimenti il sistema va in protezione per sovracorrente (E02) e il
carico non viene alimentato.
6) Montare i ferma-cavo in dotazione in modo che i peso dei cavi non sia scaricato sui morsetti elettrici, ma sul fermacavo stesso e montare lo sportello anteriore a protezione delle connessioni elettriche.
Tensione nominale batteria 12V
2
Sezione filo
2
2
2
2
10 mm 16 mm 25 mm 32 mm
10,5
16,7
26,2
33,5
20.0A 3,1
5,2
8,4
13,1
16,7
30.0A 2,1
3,5
5,6
8,7
11,2
40.0A -
2,6
4,2
6,5
8,4
50.0A -
-
3,3
5,2
6,7
60.0A -
-
2,8
4,4
5,6
Max. distanza coppia fili [m]
Corrente
6 mm
10.0A 6,3
Tensione nominale batteria 24V
2
Sezione filo
2
2
2
2
10 mm 16 mm 25 mm 32 mm
20,9
33,5
52,3
67,0
20.0A 6,3
10,5
16,7
26,2
33,5
30.0A 4,2
7,0
11,2
17,4
22,3
40.0A -
5,2
8,4
13,1
16,7
50.0A -
-
6,7
10,5
13,4
60.0A -
-
5,6
8,7
11,2
Max. distanza coppia fili [m]
Corrente
6 mm
10.0A 12,6
Tensione nominale batteria 48V
2
Sezione filo
2
2
2
2
10 mm 16 mm 25 mm 32 mm
41,9
67,0
104,7
134,0
20.0A 12,6
20,9
33,5
52,3
67,0
30.0A 8,4
14,0
22,3
34,9
44,7
40.0A -
10,5
16,7
26,2
33,5
50.0A -
-
13,4
20,9
26,8
60.0A -
-
11,2
17,4
22,3
Max. distanza coppia fili [m]
Corrente
6 mm
10.0A 25,1
tab. 3 Massima distanza percorribile da una coppia di fili attraversati da un corrente nota che garantisce una caduta di tensione inferiore al 3.0% della tensione
nominale del sistema.
This document is the property of WESTERN CO. Srl - All rights are reserved - Reproduction and use of information contained within this document is forbidden without the written consent of WESTERN CO. Srl
4
Rev. 1.3
30-05-2014
WR60 Manuale installazione
Led L1
ferma-cavi
cavo sensore
lunghezza 1.5 metri
Sensore
temperatura
e
tensione batteria
Fig. 3 Schema di collegamento
This document is the property of WESTERN CO. Srl - All rights are reserved - Reproduction and use of information contained within this document is forbidden without the written consent of WESTERN CO. Srl
5
Rev. 1.3
30-05-2014
WR60 Manuale installazione
Collaudo dell’impianto
Appena realizzati i collegamenti come in fig. 3 è necessario procedere al collaudo del sistema.
1- Verificare che il led spia L1 sia acceso, ad indicare il corretto collegamento della sonda di tensione e temperatura di
batteria.
2- Con il modulo PV esposto al sole, verificare che il WR60 ricarica la batteria andando a leggere la corrente di ricarica
IPAN e IBAT (vedi sezione ‘Visualizzazioni’ più avanti in questo manuale).
3- Verificare la corretta accensione del carico. Se il carico è acceso solo di notte è possibile simulare la notte
scollegando temporaneamente uno dei fili del modulo PV. Verificare con il carico acceso la corrente da questo assorbita
leggendo nell’apposita pagina dell’LCD.
Visualizzazioni
Vi su alizzato nel le sol e scher mate di con figu razion e
Pr otezion e batteri a scari ca
Sta to gio rno/ notte
Accension e car ico
Ind icazion e assorb imen to
corren te su l carico
In dica q uale p rogr amma di
ri car ica è attua lmente i mpostato
Visuali zza le m isu re in terne
Pagina principale.
Visualizza la tensione di batteria (VBAT), il programma di ricarica attualmente selezionato (SEAL
oppure FLOOD), lo stato giorno/notte rilevato dal modulo PV e l’icona del carico, se accesa, indica
che il carico è alimentato.
Tasto
visualizza la corrente (IPAN) del modulo PV. Ricordiamo che la corrente erogata dal modulo PV
dipende dallo stato di soleggiamento dello stesso e dallo stato di carica della batteria. Con la
batteria carica (Vbatt>14,4V @12V, Vbatt>28,8V @24V Vbatt>57,6V @48V) anche con un buon
soleggiamento del modulo si hanno correnti di ricarica basse in quanto è il regolatore che limita
tale corrente per evitare sovraccarico della batteria.
Tasto
Visualizza la potenza in watt attualmente erogata dal modulo PV.
Tasto
Visualizza il contatore dell’energia erogata dal pannello in KWh. E’ possibile azzerare questa
misura premendo contemporaneamente i pulsanti
per 2 secondi.
Tasto
Visualizza la corrente attualmente erogata al carico; anche se in questa schermata compare accesa
l’icona dal carico non è detto che questo sia effettivamente alimentato, infatti il carico è
controllato secondo il programma di gestione carico attualmente impostato.
Tasto
Visualizza la potenza attualmente erogata al carico in watt.
Tasto
This document is the property of WESTERN CO. Srl - All rights are reserved - Reproduction and use of information contained within this document is forbidden without the written consent of WESTERN CO. Srl
6
Rev. 1.3
30-05-2014
WR60 Manuale installazione
E’ visualizzato il contatore dell’energia in KWh consumati dal carico. E’ possibile azzerare questo
contatore premendo contemporaneamente i pulsanti
per 2 secondi.
Tasto
Visualizza la temperatura della batteria attualmente misurata dalla sonda di temperatura collegata
al WR60.
Tasto
Alla pressione del tasto si ritorna alla pagina principale.
Configurazione del sistema
Si accede alle pagine di configurazione del WR60 mantenendo premuti contemporaneamente per almeno 2 secondi i
tasti
.
Pagina configurazione programma di ricarica
Imposta la tensione di ricarica per la batteria.
Tasto
Il programma SEAL deve essere impiegato per batterie ermetiche o al gel,
il programma FLOOD va impiegato per la ricarica di batteria ad acido libero,
il programma LEO deve essere impostato quando alla batteria viene collegato l’inverter Leonardo della
Western co.
Tasto
Le tensioni di ricarica relative a ciascuno dei programmi sono indicate nelle successive fig. 4 e vanno scelti in
accordo con le indicazioni del costruttore della batteria.
cambio pagina
Pagina Configurazione tensione di Low Battery
Imposta la tensione di intervento della protezione di Low battery (distacco del carico in caso di batteria
scarica). Alla pressione del tasto
si modifica l’impostazione da 10.8V a 12.2V per sistemi a 12V, da
21.6V a 24.4V per sistemi a 24V e da 43,2V a 48,8V per sistemi a 48V .
cambio pagina
Pagina Configurazione soglia uscita da Low Battery
Imposta la tensione di uscita della protezione di Low battery. Alla pressione del tasto
si modifica
l’impostazione da 12.4V a 13.8V per sistemi a 12V e da 24.8V a 27.6V per sistemi a 24V e da 49.6V a 55.2V per
sistemi a 48V. Nota: questa configurazione è disponibile solo per versioni firmware ≥ 1.6
cambio pagina
Pagina Configurazione soglia rilevazione giorno
Il WR60 rileva che è giorno quando la tensione del modulo PV (VPAN) è maggiore della soglia VDAY, invece rileva
che è notte quando la VPAN è minore della soglia VNIGHT. In questa schermata è possibile modificare (con il tasto
) la soglia VDAY , mentre la soglia VNIGHT = VDAY –0.8V
cambio pagina
Pagina Configurazione programma gestione carico
..
carico
sempre
acceso sia
di giorno
sia
di
notte.
carico
carico
acceso
acceso
solo
di solo
notte.
giorno.
carico acceso di
di notte per 1 ora.
carico acceso di notte per 16 ore.
This document is the property of WESTERN CO. Srl - All rights are reserved - Reproduction and use of information contained within this document is forbidden without the written consent of WESTERN CO. Srl
7
Rev. 1.3
30-05-2014
WR60 Manuale installazione
cambio pagina
Pagina visualizzazione versione software
Visualizza la versione software in uso su WR60.
Alla pressione del tasto destro si ritorna nella pagina configurazione programma di ricarica
Una volta modificate le impostazioni del WR60 queste diventano operative solo dopo essere usciti dalla pagine di
configurazione mantenendo premuti contemporaneamente per almeno 2 secondi i tasti
.
Codici di errore
All’intervento delle protezioni interne del WR60 compaiono dei codici di errore come riportato di seguito.
Il simbolo low battery lampeggiante indica che è intervenuta la protezione di batteria scarica e
quindi per preservare la vita della batteria è stato disconnesso il carico. Questa protezione
interviene quando la tensione di batteria scende sotto la soglia VLB impostabile dall’utente. Il WR60
esce da questa protezione quando la batteria sarà ricaricata dal modulo PV alla tensione VOUT-LB
(vedi Tab. 5 caratteristiche elettriche).
Interviene quando la temperatura interna del WR60 supera gli 80°C e disattiva la ricarica. Si esce
automaticamente da questa protezione quando la temperatura interna scende al di sotto della
soglia di 50°C. (nota la temperatura interna al regolatore non è visualizzata nell’LCD). Qualora
intervenga spesso questa protezione consigliamo di alloggiare il regolatore in un luogo più fresco.
Intervenuta protezione di sovraccarico. La corrente del carico ha superato il limite massimo
consentito per il WRR60 (Iload nella tabella caratteristiche elettriche) e il regolatore ha distaccato il
carico per prevenire rotture interne. Nel caso intervenga questa segnalazione è necessario verificare
se la corrente assorbita dal carico è inferiore al limite consentito. Dopo 1 minuto il WR60 tenta di
alimentare nuovamente il carico e esce da questo stato se è sta eliminata la causa che ha generato il
sovraccarico.
Errore batteria. All’avvio il regolatore ha rilevato una tensione di batteria anomala e quindi non è
stato in grado di rilevare la tensione nominale di batteria. Questo errore potrebbe essere causato
da batterie eccessivamente scariche, quindi in caso di comparsa di questo errore è necessario
sostituire le batterie.
Tab. 4 Codici errore
16,0
Tensine fine carica in funzione della temperatura sistema a 12V
32,0
FLOOD
Tensine fine carica in funzione della temperatura sistema a 24V
SEAL
31,5
Tensione fina carica Volt
Tensione fina carica Volt
SEAL
15,5
15,0
14,5
14,0
FLOOD
31,0
30,5
30,0
29,5
29,0
28,5
28,0
27,5
27,0
13,5
-10 -5
0
5
-10
10 15 20 25 30 35 40 45 50 55 60
Temperatura °C
-5
0
5
10
15
20
25
30
35
40
45
50
55
60
Temperatura °C
Tensine fine carica in funzione della temperatura sistema a 48V
64,00
SEAL
FLOOD
63,00
Tensione fine carica Volt
62,00
61,00
60,00
59,00
58,00
57,00
56,00
55,00
54,00
-10
-5
0
5
10
15
20
25
30
35
40
45
50
55
60
Temperatura °C
Fig. 4 Curva di compensazione della tensione di ricarica Vch in funzione della temperatura di batteria
This document is the property of WESTERN CO. Srl - All rights are reserved - Reproduction and use of information contained within this document is forbidden without the written consent of WESTERN CO. Srl
8
Rev. 1.3
30-05-2014
WR60 Manuale installazione
CARATTERISTICHE ELETTRICHE
Tensione di batteria
Tensione di pannello a circuito aperto
Corrente di pannello
Massima potenza di pannello
Tensione uscita carico
Corrente del carico
Tensione di ricarica a 25°C programma SEAL (default)
Tensione di ricarica a 25°C programma FLOOD
Compensazione della Vch funzione della temperatura di
batteria (Tbatt)
Tensione di low battery (impostabile)
Vtadj
Tensione nominale
batteria 12V
Min.
Tip.
Max.
12.0V
22V
100V
60.0A
800W
Tensione di
batteria
10.0A
14.4V
14.8V
-24mV/°C
-
Tensione nominale batteria
24V
Min.
Tip.
Max.
24.0V
44V
100V
60.0A
1,6KW
Tensione di
batteria10.0A
28.8V
29.6V
-48mV/°C
-
Tensione nominale batteria
48V
Min.
Tip.
Max.
48.0V
88V
100V
60.0A
3,2KW
Tensione di
batteria
10.0A
57.6V
59.2V
-96mV/°C
-
Vlb
11.0V
22.0V
44.0V
Vbatt
Vpan
Ipan
Pmax
Vload
Iload
Vch
Vch
11.4V
12.0V
22.8V
24.0V
(default)
Tensione uscita low battery (impostabile)
Vout_lb
12.4V
13.8V
Vday
2.5V
6.5V
13.8V
24.8V
Vnight
Temperatura di esercizio
Potenza dissipata
Sezione ai morsetti
Tamb
Pdiss
Grado di protezione
Peso
1.5V
27.6V
27.6V
49.6V
(default)
10.0V
5.0V
(default)
Tensione rilevazione notte: Vnight = Vday –1.0V
Auto consumo
48.0V
(default)
(default)
Tensione rilevazione giorno (impostabile)
45.6V
13.0V
55.2V
55.2V
(default)
20.0V
10.0V
(default)
26.0V
40.0V
(default)
9.0V
12.7mA
(Vbat
14,0V)
9.0V
4.0V
19.0V
19.0V
9.0V
39.0V
17,7mA
(Vbat
28,0V)
39.0V
-10°C
-
+60°C
-10°C
-
+60°C
-10°C
-
60°C
-
-
20W
35
mm2
-
-
20 W
35 mm2
-
-
20 W
35 mm2
-
1800
-
-
IP20
1800g
-
Isleep
IP20
1800 g
Tab. 5 caratteristiche elettriche
Dimensioni
viti per apertura
sportello morsetti
elettrici
Fig. 5 Dimensioni
This document is the property of WESTERN CO. Srl - All rights are reserved - Reproduction and use of information contained within this document is forbidden without the written consent of WESTERN CO. Srl
9
Rev. 1.3
30-05-2014
WR60 Manuale installazione
Garanzia di legge
Western Co srl garantisce la buona qualità e la buona costruzione dei Prodotti obbligandosi, durante il periodo di
garanzia di 5 (cinque) anni, a riparare o sostituire a sua sola discrezione, gratuitamente, quelle parti che, per cattiva
qualità del materiale o per difetto di lavorazione si dimostrassero difettose.
Il prodotto difettoso dovrà essere rispedito alla Western Co srl o a società delegata dalla Western Co srl a fare assistenza
sul prodotto, a spese del cliente, assieme ad una copia della fattura di vendita, sia per la riparazione che la sostituzione
garantita. I costi di re-installazione del materiale saranno a carico del cliente.
La Western Co srl sosterrà le spese di re spedizione del prodotto riparato o sostituito.
La garanzia non copre i Prodotti che, in base a nostra discrezione, risultino difettosi a causa di naturale logoramento,
che presentino guasti causati da imperizia o negligenza del cliente, da imperfetta installazione, da manomissioni o
interventi diversi dalle istruzioni da noi fornite .
La garanzia decade altresì in caso di danni derivanti da:
-trasporto e/o cattiva conservazione del prodotto.
-causa di forza maggiore o eventi catastrofici (gelo per temperature inferiori a -20°C, incendio, inondazioni, fulmini, atti
vandalici, ecc…).
Tutte le sopraccitate garanzie sono il solo ed esclusivo accordo che soprassiede ogni altra
proposta o accordo verbale o scritto e ogni altra comunicazione fatta tra il produttore e l’acquirente in rispetto
a quanto sopra.
Per qualsiasi controversia il Foro competente è Ascoli Piceno.
Smaltimento dei rifiuti
La Western Co in qualità di produttore del dispositivo elettrico descritto nel presente
manuale, ed in conformità al D.L 25/07/05 n 151, informa l’acquirente che questo
prodotto, una volta dismesso, deve essere consegnato ad un centro di raccolta
autorizzato oppure, in caso di acquisto di apparecchiatura equivalente può essere
riconsegnato a titolo gratuito al distributore della apparecchiatura nuova.
Le sanzioni per chi abusivamente si libera di un rifiuto elettronico saranno applicate
dalle singole amministrazioni comunali.
WESTERN CO. srl
Via Pasubio 1
63037 San Benedetto del Tronto (AP)
tel 0735 751248 fax 0735 751254
e-mail: [email protected]
web: www.western.it
This document is the property of WESTERN CO. Srl - All rights are reserved - Reproduction and use of information contained within this document is forbidden without the written consent of WESTERN CO. Srl
10
Rev. 1.3
30-05-2014
WR60 – Technical manual
60A SOLAR CHARGE CONTROLLER
FOR LEAD BATTERIES
• PWM charge
WR60
• Max charge current: 60A
• Integrated blocking diode
• For Pb sealed, GEL and flooded lead acid batteries
• Charge voltage compensated in temperature
• Battery voltage: 12V / 24V and 48V
• Configurable parameters by two buttons and LCD
• 18 programs for load management
• Low battery protection
• Over temperature protection
• Protection for battery polarity inversion
• Overload protection on output
• IP20 metal box
• Terminal for 35mm2 wire housing
WR60 is a charge regulator from PV modules for the charge of both sealed and
flooded lead acid batteries. It protects the battery from overloads or deep
discharges so to make it work always in the best conditions and to maximize its
useful life. WR60 has got a simple and reliable PWM charge circuit. It is
planned to be used in large PV plants for industrial and residential applications
and it can manage battery banks at 12V, 24V and 48V.
WR60 has got an output (LOAD) that can be used to power supply a small load
to the battery voltage (Max 10A) according to 18 different automatic
management programs: load always ON, load ON only during the day, load ON
only during the night or load ON from twilight for a number of hours from 1 to
16. The loads that are power supplied through LOAD output are automatically
deactivated if the battery voltage falls below a voltage threshold called “ low
battery”; this guarantees the battery protection from deep discharges.
A wide display shows the working status of the regulator either through simple
and intuitive icons or through the visualization of the following values: charge
current, battery voltage, energy produced by PV module, load current and
energy consumed by the load.
This document is the property of WESTERN CO. Srl - All rights are reserved - Reproduction and use of information contained within this document is forbidden without the written consent of WESTERN CO. Srl
11
Rev. 1.3
30-05-2014
WR60 – Technical manual
General description
WR60 is a charge regulator from PV modules for Pb electrochemical batteries either sealed (SEAL) or flooded lead acid
(FLOOD). Fig. 1 shows a diagram of WR60.
MICRO CONTROLLER
4
IPAN
1
Icharge
2
VBATT
VPAN
ILOAD
WR-60
3
Fig. 1 Block diagram
5- Series diode: it is needed to avoid that the not-lighted PV module (during night) can absorb current from the battery.
6- The charge circuit can be thought as a switch that connects in parallel the PV module to the battery when the battery
has got a lesser voltage than the maximum charging voltage (Vch), while it disconnects the PV module from the
battery when the battery voltage is > or = to the maximum charging voltage (Vch).
The charge circuit is made of
semiconductor components that are more reliable and durable than electromechanical components. This kind of
charging circuit is known as PWM series.
7- The load is power supplied with the same battery voltage (the positive terminal of LOAD output is in common with
the positive of battery) and is controlled through a semiconductor switch.
8- Microprocessor: it controls the whole circuit; it measures current and voltages of PV module, battery and load and
shows them on the display.
For a more precise detection of the correct voltage and battery temperature, WR60 measures these quantities through
a sensor placed close to battery terminals (the sensor is included in the product).
It is important to
connect this sensor so to guarantee the compensation in temperature of the system’s end-charge voltage (Vch) and for
a measure of the battery voltage that is independent from the voltage drop on cables. If you do not connect this sensor
the system works equally, but the battery voltage is measured on the internal terminals of WR60, while the
compensation of Vch in function of temperature is not performed and prudently Vch is set to the minimum value as if
the system detects a temperature of 60°C. The LED L1 (fig. 3) is turned on only when the temperature sensor and
battery voltage are properly connected; therefore, if L1 is not ON, check the connections of the probe.
WR60 has got an automatic detection of battery voltage that allows the automatic recognition of the battery nominal
voltage and it sets the proper charging parameters as shown in tab. 5.
This document is the property of WESTERN CO. Srl - All rights are reserved - Reproduction and use of information contained within this document is forbidden without the written consent of WESTERN CO. Srl
12
Rev. 1.3
30-05-2014
WR60 – Technical manual
During the activation WR60 measures the battery voltage (Vbatt) on internal terminals and, according to this measure,
it recognizes the battery nominal voltage according to the levels that are shown in Table 1.
battery voltage measured at startup
10.0V < Vbatt < 16.0V
20.0V < Vbatt < 32.0V
40.0V < Vbatt < 64.0V
Battery at 12V
Battery at 24V
Battery at 48V
Table 1 recognition thresholds for battery nominal voltage
If the battery voltage does not fall into one of the abovementioned bands, WR60 reports E03 error (see Table 4), it does
not charge and it does not power supply any loads connected to the system.
If there is such an error, check the voltage of the battery bank.
Choice of PV module and strings
The choice of PV modules to use in the photovoltaic system is closely linked to the battery voltage.
Please follow strictly to what is indicated in the Table below in choosing the PV modules string configuration
to use in the system.
Battery nominal voltage
12V battery
24V battery
48V battery
Features of PV modules
Strings with 36 cells - Mono-crystalline / poly-crystalline silicon
typical Voc @25 21.0V
Max Isc 60 A
Strings with 72 cells - Mono-crystalline / poly-crystalline silicon
typical Voc @25 42.0V
Max Isc 60 A
Strings with 144 cells - Mono-crystalline / poly-crystalline silicon
typical Voc @25 84.0V
Max Isc 60 A
Table 2
When you connect more than 2 PV modules in parallel, it is compulsory to use the parallel diodes as shown in fig. 2:
fig. 2. Connect 3 or more strings in parallel using appropriate parallel diodes
If you have to use the parallel diodes as in fig. 2, we recommend to buy Western Co. product code JB5.
Wiring scheme
1) Install WR60 in a dry and adequately ventilated place, fixed on a non-flammable surface and positioned so to leave
an unobstructed space of at least 10cm near the device so to have a cooling for natural air convection. Remove the
front cover to access to electrical connections (see fig. 5 later in this manual).
2) Connect following this order: load, sensor for temperature measure and battery voltage (included), PV module and
finally the battery as shown in the diagram - fig. 3. When connecting the battery, the regulator turns on and begins
to operate. You must choose the cable sections so that in any part of the cable the maximum allowed voltage drop is
This document is the property of WESTERN CO. Srl - All rights are reserved - Reproduction and use of information contained within this document is forbidden without the written consent of WESTERN CO. Srl
13
Rev. 1.3
30-05-2014
WR60 – Technical manual
< of 1.5% of the system nominal voltage. In table 3 there is the maximum length of the cable that guarantees a
voltage drop < 3.0% of nominal Vbatt in relation to mm2 section.
3) You can connect to WR60 Pb batteries with 12V, 24V or 48V nominal voltage. During activation WR60 measures the
battery voltage, recognizes the nominal voltage of the battery bank and it sets automatically the correct levels of
charging voltage (see description at page 2). Please configure the kind of battery in use to adjust the correct charging
voltage (Vch ). Please set SEAL configuration if you use sealed VRLA or GEL batteries, and set FLOOD configuration if
you use flooded lead acid batteries. To make this setting follow the instructions in the 'System Configuration' section,
later in this manual.
5) Set the load management program for your application. Note: do not connect loads that absorb a current > 10A to
LOAD output, otherwise the system goes into over-current protection (E02) and the load is not power supplied.
6) Mount the given cable-clamp so that the weight of the cables is not passed on to the electrical terminals, but on the
same cable-clamp; then please mount the front door to protect electrical connections.
Current
10.0A
Wire section
6 mm2 10 mm2 16 mm2 25 mm2 32 mm2
6,3
10,5
16,7
26,2
33,5
20.0A 3,1
5,2
8,4
13,1
16,7
30.0A 2,1
3,5
5,6
8,7
11,2
40.0A -
2,6
4,2
6,5
8,4
50.0A -
-
3,3
5,2
6,7
60.0A -
-
2,8
4,4
5,6
Max distance pair of wires [m]
12V battery nominal voltage
Current
10.0A
Wire section
6 mm2 10 mm2 16 mm2 25 mm2 32 mm2
12,6
20,9
33,5
52,3
67,0
20.0A 6,3
10,5
16,7
26,2
33,5
30.0A 4,2
7,0
11,2
17,4
22,3
40.0A -
5,2
8,4
13,1
16,7
50.0A -
-
6,7
10,5
13,4
60.0A -
-
5,6
8,7
11,2
Max distance pair of wires [m]
24V battery nominal voltage
Current
10.0A
Wire section
6 mm2 10 mm2 16 mm2 25 mm2 32 mm2
25,1
41,9
67,0
104,7
134,0
20.0A 12,6
20,9
33,5
52,3
67,0
30.0A 8,4
14,0
22,3
34,9
44,7
40.0A -
10,5
16,7
26,2
33,5
50.0A -
-
13,4
20,9
26,8
60.0A -
-
11,2
17,4
22,3
Max distance pair of wires [m]
48V battery nominal voltage
Table 3 maximum cable distance for two wires battery cables, which guaranteed the maximum voltage drop of 3%
of battery nominal voltage system at rated charging current
This document is the property of WESTERN CO. Srl - All rights are reserved - Reproduction and use of information contained within this document is forbidden without the written consent of WESTERN CO. Srl
14
Rev. 1.3
30-05-2014
WR60 – Technical manual
Led L1
Cable Clamp
Sensor cable
length 1.5 meters
Temperature and
battery voltage
sensor
Fig. 3 Wiring scheme
This document is the property of WESTERN CO. Srl - All rights are reserved - Reproduction and use of information contained within this document is forbidden without the written consent of WESTERN CO. Srl
15
Rev. 1.3
30-05-2014
WR60 – Technical manual
Testing of the system
Once made the connections as shown in fig. 3, it is necessary to test the system.
4- Verify that L1 LED indicator is ON, to indicate the proper connection of the voltage and temperature battery sensor.
5- With the PV module exposed to sunrays, verify that WR60 charges the battery going to read the charging current IPAN
and IBAT (see section ‘Visualizations’ later in this manual).
6- Check the correct LOAD activation. If the load in ON only during night it is possible to simulate the night temporarily
disconnecting one of the wires of the PV module. With the load ON, verify the current absorbed by it reading in the
proper LCD page.
Visualizations
It ap pears on ly in th e config urati on screens
Low b attery pro tection
Day/n igh t statu s
Loa d activati on
Info ab out curr ent
absorpt ion o n the l oad
It in dicates wh ich char ge
pro gram i s curre ntly set
I t displa ys th e inter nal measures
Main page.
It shows the battery voltage (VBAT), the charging program currently selected (SEAL or FLOOD), the
day/night status detected by the PV module. The load icon, if ON, indicates that the load is power
supplied.
push-button
It shows the current of the PV module (IPAN). Remember that the current delivered by the PV
module depends on its state of sun irradiation and on the battery state of charge. In condition of
charged battery (Vbatt>14,4V @12V, Vbatt>28,8V @24V Vbatt>57,6V @48V) even with a good
sun irradiation of the PV module we have low charge currents since the regulator limits such a
current to avoid a battery overcharge.
push-button
It shows the power in watt actually delivered y the PV module.
push-button
It displays the counter of energy that is delivered from the PV module in KWh. It is possible to
reset such measure by pushing at the same time the push-buttons
for 2 seconds.
push-button
It displays the current actually delivered to the load; even if in this screen there is the load icon
ON, this does not mean that the load is not effectively power supplied. In fact the load is
controlled according to the program of load management which is actually set.
push-button
It shows the power actually delivered to the load in watt.
push-button
It displays the counter of energy in KWh consumed by the load. It is possible to reset such
measure by pushing at the same time the push-buttons
for 2 seconds.
push-button
This document is the property of WESTERN CO. Srl - All rights are reserved - Reproduction and use of information contained within this document is forbidden without the written consent of WESTERN CO. Srl
16
Rev. 1.3
30-05-2014
WR60 – Technical manual
It shows the battery temperature currently measured by the temperature sensor connected to
WR60.
push-button
When you press this button you go back to the main page.
System configuration
You can access to the configuration pages of WR60 by pressing at the same time the push-buttons
for at least 2 seconds.
Charge program configuration page
It sets the charge voltage for the battery.
We advise to set the SEAL program for PB sealed / GEL batteries,
push-button
We advise to set the FLOOD program for the charge of flooded lead acid batteries,
We advise to set the LEO program when you connect to the battery the Western Co Leonardo inverter.
push-button
The charge voltages related to each are indicated in fig. 4 and have to be chosen according to the
manufacturer's battery.
change of page
Low Battery voltage configuration page
It sets the intervention voltage of Low battery protection (load disconnection in case of discharged battery).
By pressing the push-button
you modify the setting from 10.8V to 12.2V for 12V systems, from 21.6V
to 24.4V for 24V systems and from 43,2V to 48,8V for 48V systems .
change of page
Low Battery voltage reconnect configuration page
It sets threshold voltage for low battery exit. With
button you will modify the threshold in the range
from 12.4V to 13.8V for 12V systems, and from 24.8V to 27.6V for 24V systems and from 49.6V to 55.2V for
48V systems. Note: this configuration is implemented from firmware version ≥1.6
change of page
Threshold day detection configuration page
WR60 detects that it is day when the PV module voltage (VPAN) is > than VDAY threshold. It detects that it is
night when VPAN is < than VNIGHT threshold. In this screen it is possible to modify (by pressing
threshold, while the threshold VNIGHT = VDAY –0.8V
) VDAY
change of page
Load management configuration page
..
Load
always ON
Load ON Load ON Load ON during
either
only during
during day only during
night for 1 hour.
night.
or during day.
night.
Load ON during night for 16 hours.
change of page
Page for visualization of software version
It displays the software version of WR60.
This document is the property of WESTERN CO. Srl - All rights are reserved - Reproduction and use of information contained within this document is forbidden without the written consent of WESTERN CO. Srl
17
Rev. 1.3
30-05-2014
WR60 – Technical manual
When pressing the right push-button, you go back to the configuration page of the charge program
Once you have modified the settings of WR60 these become operative only after having left the configuration pages by
pressing at the same time the push-buttons
for at least 2 seconds.
Error codes
When in WR60 an internal protection occurs, it is displayed the error code (see table below):
The flashing low battery symbol indicates that there is the low battery protection; therefore the
load has been disconnected to preserve battery life. This protection intervenes when the battery
voltage falls below VLB threshold which can be set by the user. WR60 leaves this protection when
the battery will be charged by the PV module at VOUT-LB voltage (see Table 5 - electrical features).
It occurs when the internal temperature of WR60 exceeds 80°C and it deactivates the charge. This
protection automatically leaves when the internal temperature falls below the threshold of 50°C.
(note: the internal temperature of the regulator is not displayed in the LCD). If there is often this
protection we recommend to place the regulator in a cooler location.
It occurred the overload protection. The charge current has exceeded the maximum allowed limit
for WR60 (Iload in “electrical features” table) and the regulator disconnected the load to prevent
internal breaks. If there is this message please check if the current absorbed by the load is < than
the allowable limit. After 1 minute WR60 tries again to power supply the load and it leaves this
status if the cause that generated the overload has been eliminated.
Battery error. During activation the controller has detected an anomalous battery voltage and,
therefore, it has not been able to detect the battery nominal voltage. This error could be caused by
excessively discharged batteries; therefore when there is this error you need to replace batteries.
Table 4 - Error codes
16,0
End-charge voltage according to temperature - 12V system
FLOOD
End-charge voltage according to temperature - 24V system
SEAL
31,5
Tensione fina carica Volt
End-charge voltage - Volt
S EAL
32,0
15,5
15,0
14,5
14,0
FLOOD
31,0
30,5
30,0
29,5
29,0
28,5
28,0
27,5
27,0
13,5
-10 -5
0
5
-10
10 15 20 25 30 35 40 45 50 55 60
Temperature °C
-5
0
5
10
15
20
25
30
35
40
45
50
55
60
Temperature °C
End-charge voltage according to temperature - 48V system
64, 00
SEAL
FLOOD
63, 00
End-charge voltage - Volt
62,00
61,00
60,00
59,00
58, 00
57,00
56, 00
55, 00
54, 00
-10
-5
0
5
10
15
20
25
30
35
40
45
50
55
60
Tempe ratura °C
Fig. 4 Compensation curve of Vch charge voltage according to battery temperature
This document is the property of WESTERN CO. Srl - All rights are reserved - Reproduction and use of information contained within this document is forbidden without the written consent of WESTERN CO. Srl
18
Rev. 1.3
30-05-2014
WR60 – Technical manual
ELECTRICAL FEATURES
Battery voltage
PV Open circuit voltage
Panel current
Max panel power
Load output voltage
Load current
Charge voltage at 25°C – SEAL program (default)
Charge voltage at 25°C - FLOOD program
Vch charge voltage compensation function of battery
temperature (Tbatt)
Low battery voltage (it can be set)
Min.
-
Typ.
24.0V
44V
-
Vtadj
12V battery nominal
voltage
Min.
Typ.
Max.
12.0V
22V
100V
60.0A
800W
Battery voltage
10.0A
14.4V
14.8V
-24mV/°C
-
Vlb
11.0V
22.0V
Vbatt
Vpan
Ipan
Pmax
Vload
Iload
Vch
Vch
11.4V
12.0V
24V battery nominal voltage
48V battery nominal voltage
-48mV/°C
Max.
100V
60.0A
1,6KW
10.0A
-
Min.
-
22.8V
24.0V
44.0V
Battery voltage
28.8V
29.6V
Typ.
48.0V
88V
Battery voltage
57.6V
59.2V
-96mV/°C
45.6V
(default)
Low battery resume voltage (it can be set)
Vout_lb
12.4V
13.8V
Vday
2.5V
6.5V
13.8V
24.8V
27.6V
27.6V
49.6V
(default)
10.0V
5.0V
13.0V
55.2V
Vnight
Operating Temperature
Dissipated power
Terminals’ section
Tamb
Pdiss
IP protection degree
Weight
1.5V
55.2V
(default)
20.0V
10.0V
26.0V
(default)
Voltage for night detection: Vnight = Vday –1.0V
Self-consumption
48.0V
(default)
(default)
Voltage for day detection (it can be set)
Max.
100V
60.0A
3,2KW
10.0A
-
40.0V
(default)
9.0V
12.7mA
(Vbat
14,0V)
9.0V
4.0V
19.0V
19.0V
9.0V
39.0V
17,7mA
(Vbat
28,0V)
39.0V
-10°C
-
+60°C
-10°C
-
+60°C
-10°C
-
60°C
-
-
20W
35
mm2
-
-
20 W
35 mm2
-
-
20 W
35 mm2
-
1800g
-
-
IP20
1800g
-
Isleep
IP20
1800 g
Tab. 5 electrical features
Dimensions
Screws for cover remove
and
electrical
connections
Fig. 5 Dimensions
This document is the property of WESTERN CO. Srl - All rights are reserved - Reproduction and use of information contained within this document is forbidden without the written consent of WESTERN CO. Srl
19
Rev. 1.3
30-05-2014
WR60 – Technical manual
Warranty
Western Co. Srl guarantees the good quality and manufacturing of its products obliging itself, during the warranty
period of 5 (five) years, to repair or replace at its sole discretion, for free, those parts that are defective owing to poor
quality material or workmanship defect.
The defective product must be returned to Western Co Srl by a delegated company for assistance, at the expense of the
customer, along with a copy of the sales invoice, both for repairing and guaranteed replacement. The costs of reinstallation of the material will be borne by the customer.
Western Co srl will pay the transport expenses for the shipment of the repaired/replaced product.
Warranty does not cover Products that, according to our discretion:
- are defective owing to natural wear,
- have failures caused by malpractice or negligence of the customer, by incorrect installation, by tampering or
interventions that are different from the instructions supplied by us.
Warranty is void if damage is also caused by:
- transport and/or bad storage of the product.
- force major or catastrophic events (frost for temperatures < -20°C, fire, flooding, lightning, vandalism, and so on).
All the above guarantees are the sole and exclusive agreement which supersedes any proposal
or agreement whether written or oral and any other communication made between the producer and the
purchaser with respect to the above. For any dispute the jurisdiction is Ascoli Piceno (Italy).
Disposal of waste
Western Co., as a producer of electrical device herein described and in accordance
with Law No. 151 25/07/05, informs the buyer that this product, once divested, must
be delivered to an authorized recycling centre or, in case of purchase of equivalent
equipment, it may be returned at no cost to the distributor of the new equipment.
Penalties for those who get rid of an electronic waste will be used by individual
municipalities.
WESTERN CO. srl
Via Pasubio 1
63074 San Benedetto del Tronto (AP) - Italy
tel + 39 0735 751248 fax +39 0735 751254
e-mail: [email protected]
web: www.western.it
This document is the property of WESTERN CO. Srl - All rights are reserved - Reproduction and use of information contained within this document is forbidden without the written consent of WESTERN CO. Srl
20

